Loading...

零成本从0到1搭建个人博客

阅读 ...

测试环境:Windows 11 专业版 + Git 2.45.1

下载Hugo

点击进入以下网页:https://github.com/gohugoio/hugo/tags
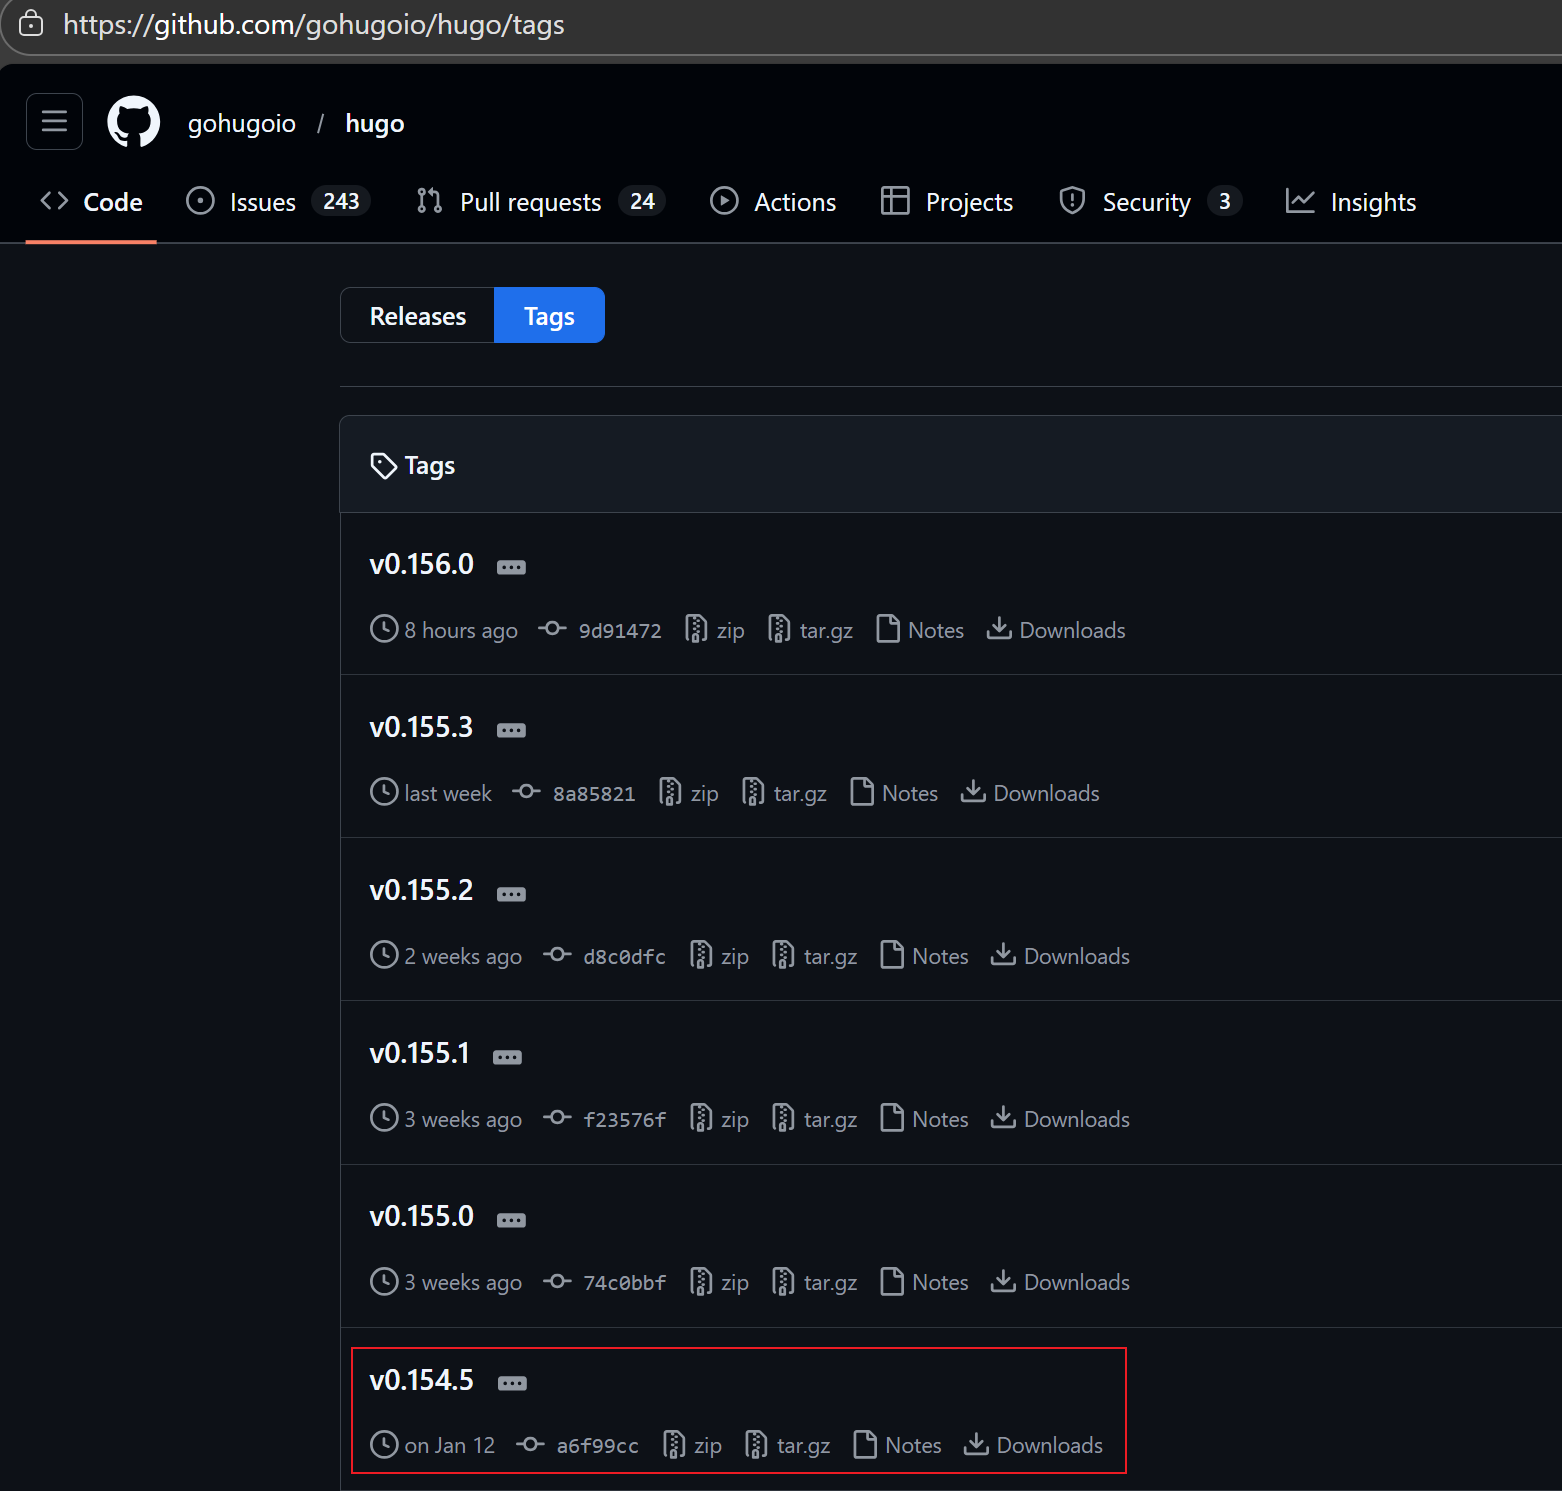
可按需选择版本,如v0.154.5。
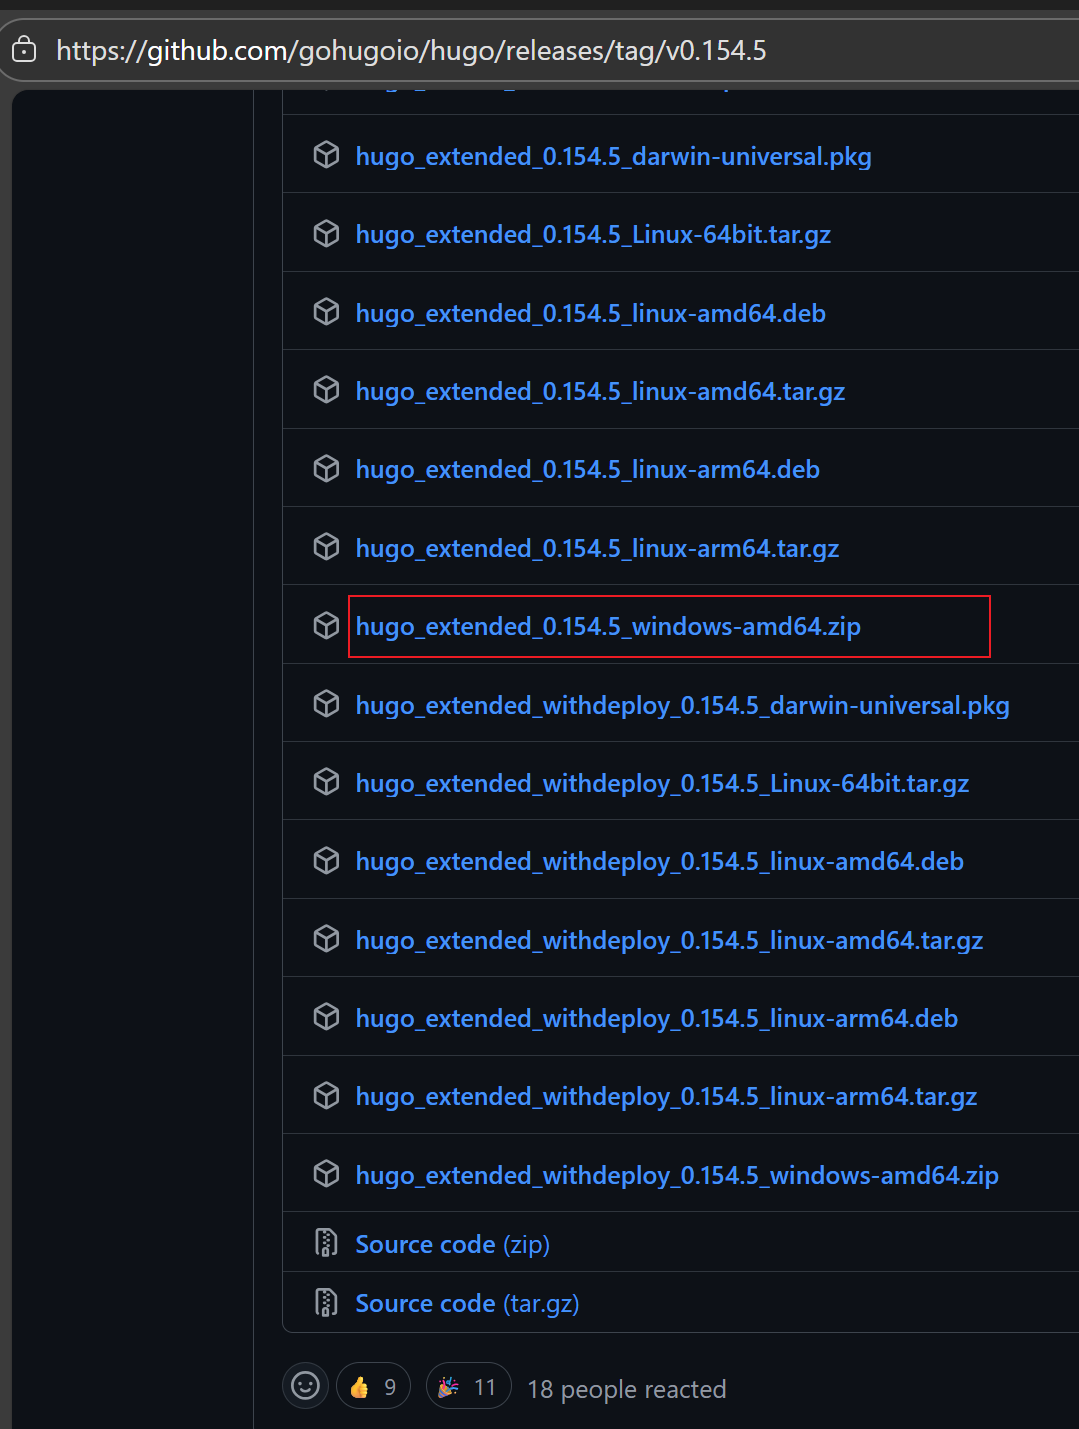
也可以通过百度网盘链接下载:

【hugo_extended_0.154.5_windows-amd64.zip】

链接: https://pan.baidu.com/s/1XD1Zi877nFvVZaXw0Q9-wA 提取码: 477k

创建个人博客

解压这个压缩包,进入到解压后的文件夹,右键进入命令行界面,输入以下命令【hugo new site CodeEdge】,其中【CodeEdge】名字可任意取。
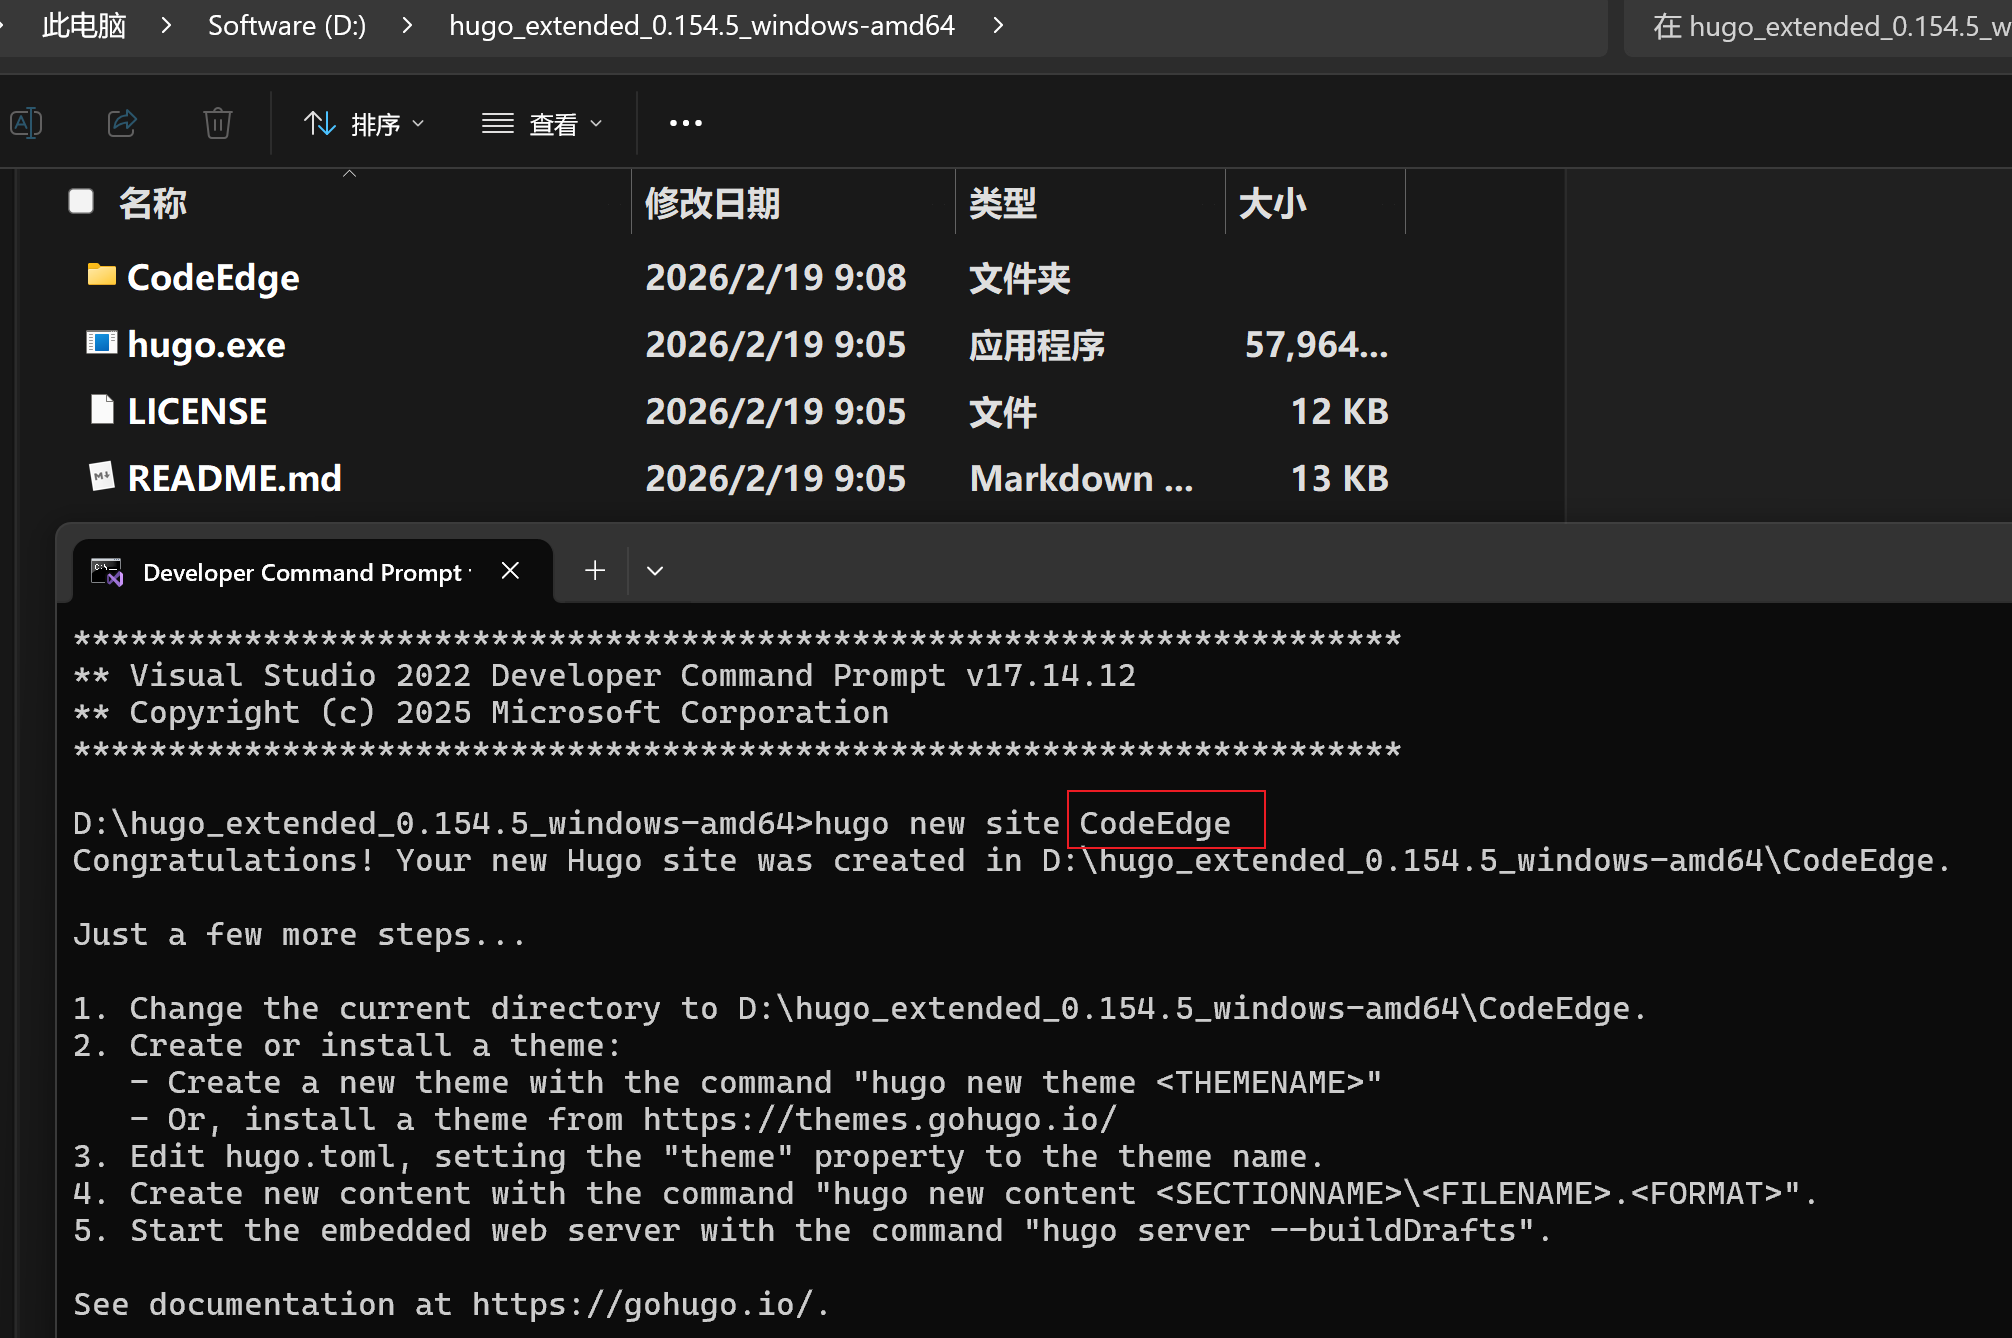
将【hugo.exe】文件复制到【CodeEdge】文件夹中,再cd到CodeEdge目录,执行以下命令启动服务【hugo server -D】

配置个人博客的主题

点击进入以下网页https://github.com/CaiJimmy/hugo-theme-stack/tags,这里选择的是【Stack】主题,可按需选择版本,如v3.33.0。
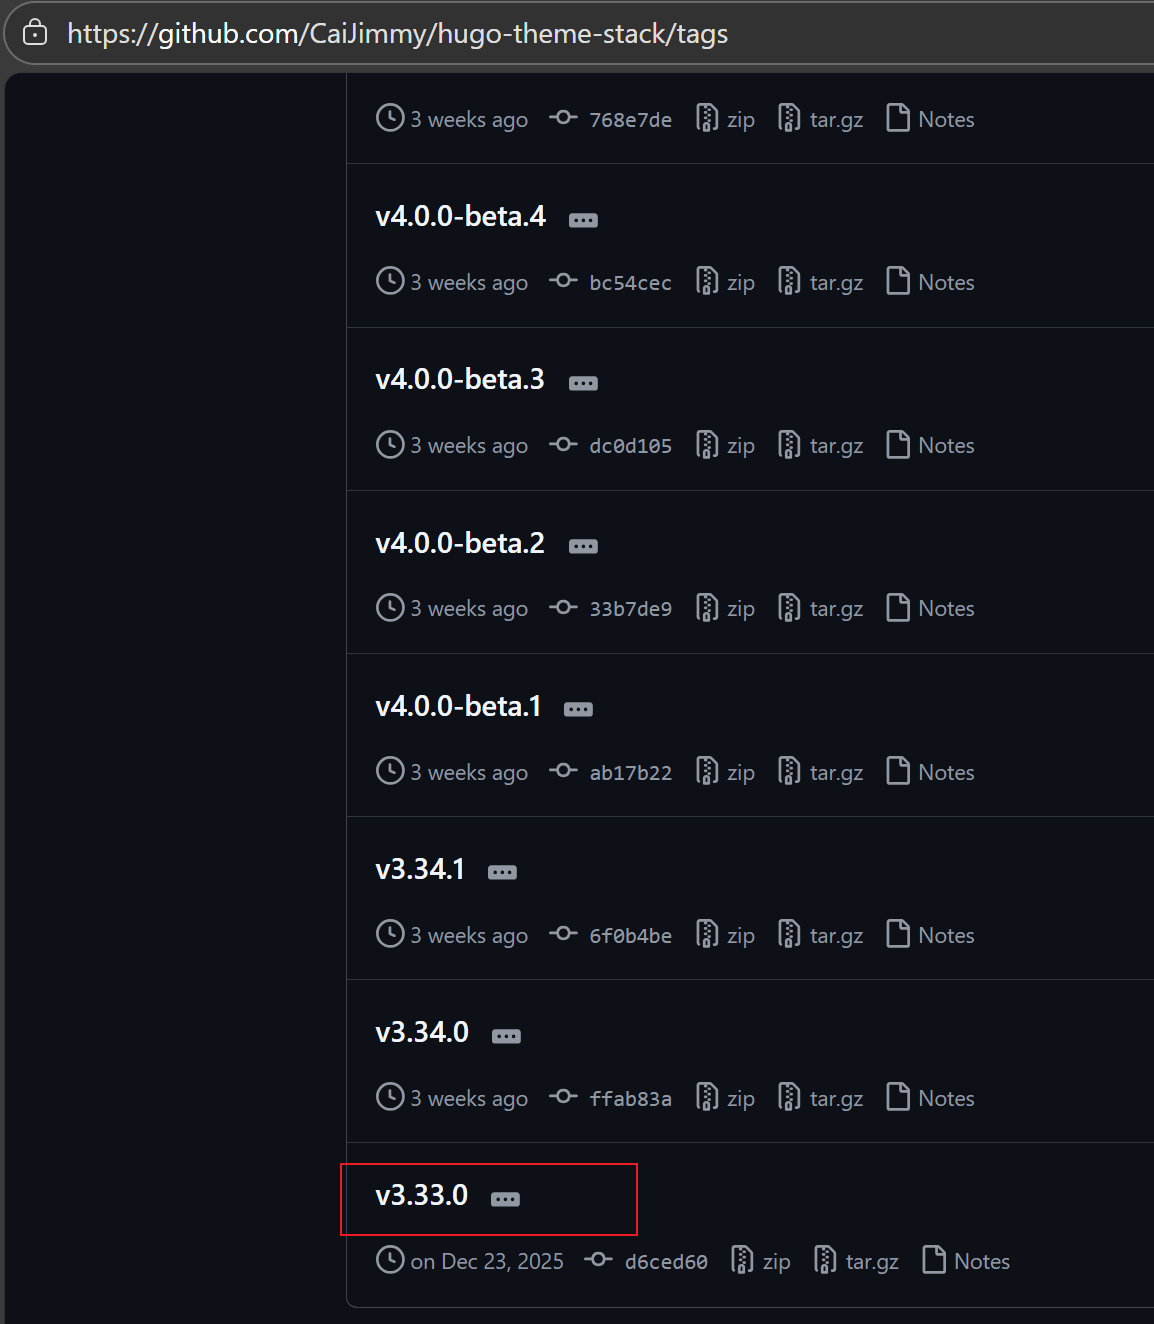
也可以通过百度网盘链接下载:

【hugo-theme-stack-3.33.0.zip】

链接: https://pan.baidu.com/s/1rNPzDXJbeFSrqURK4X1JJg 提取码: pwgv

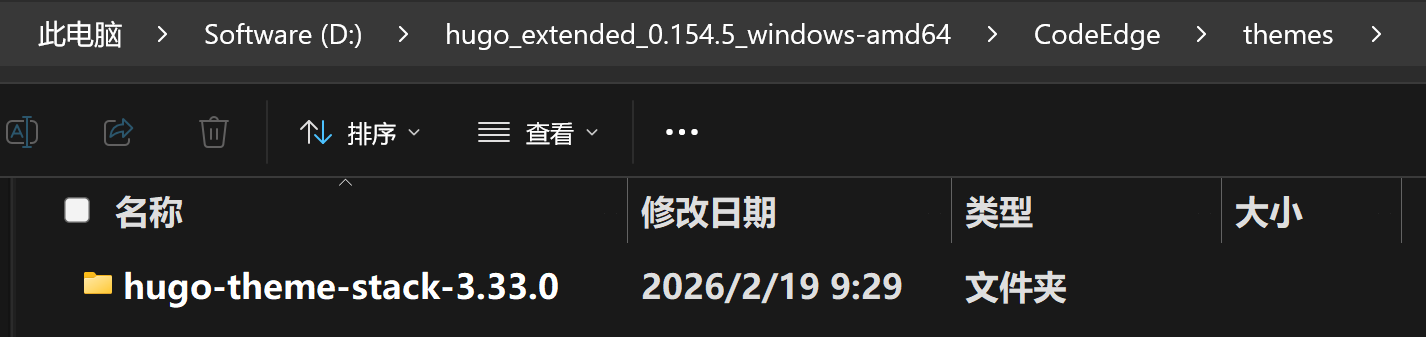
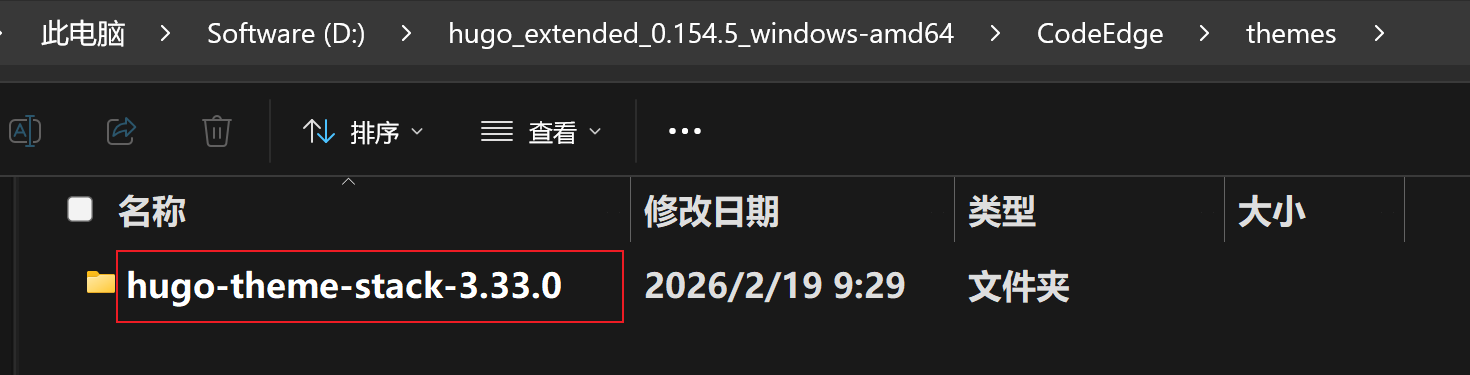
将这个压缩包解压到CodeEdge的themes文件夹下:
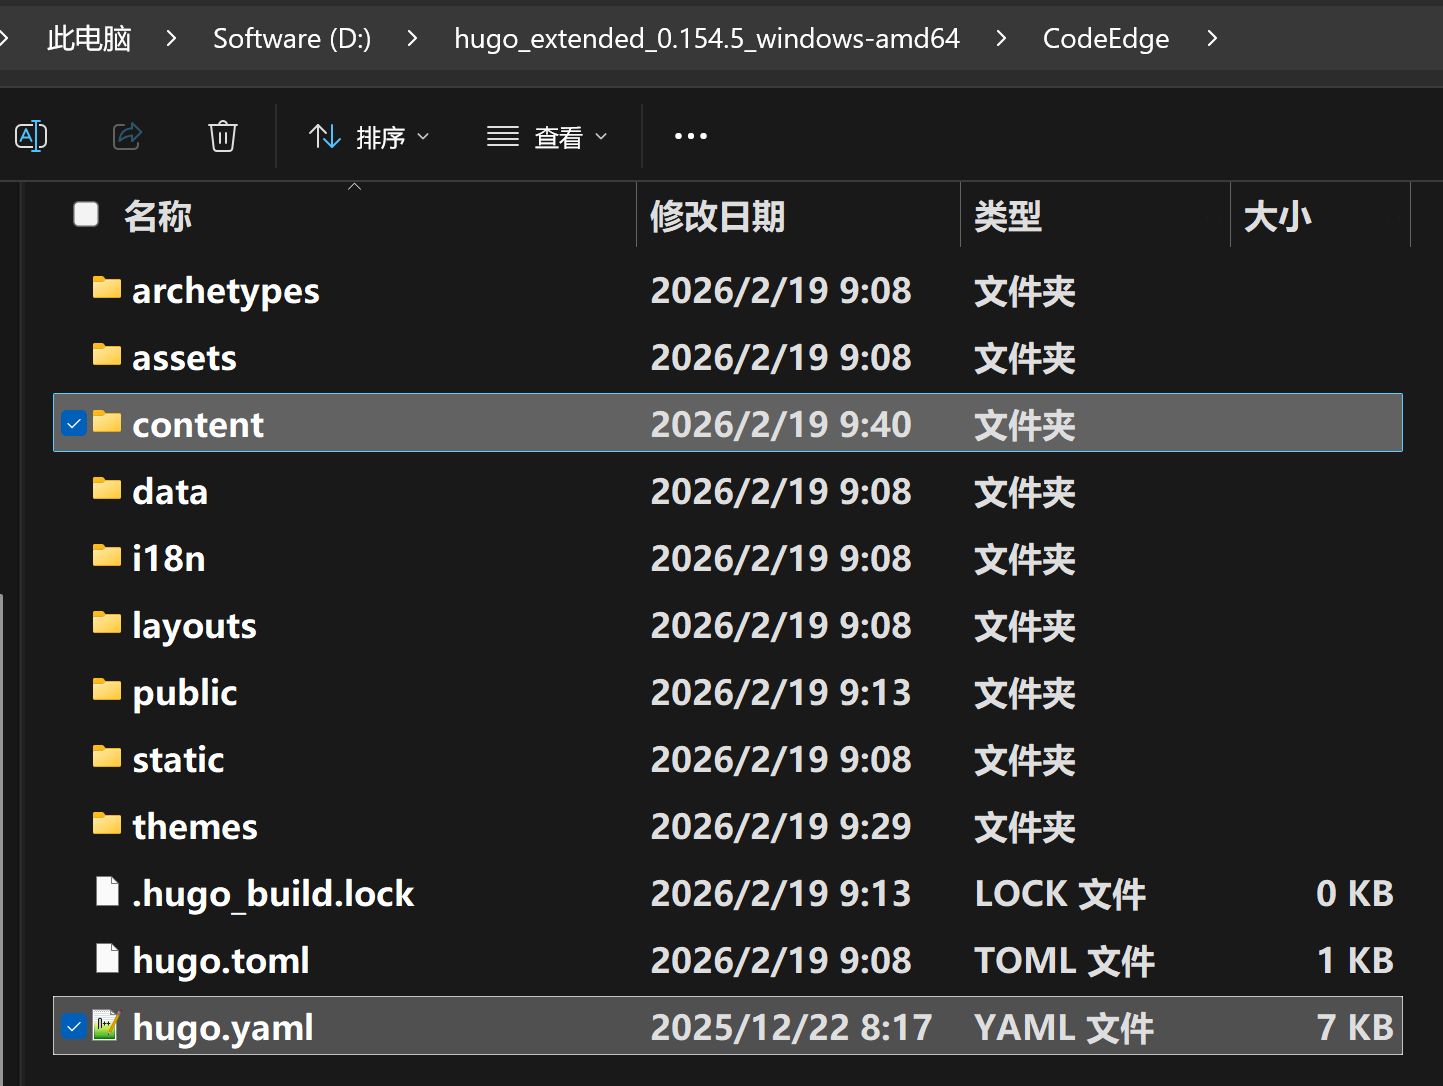
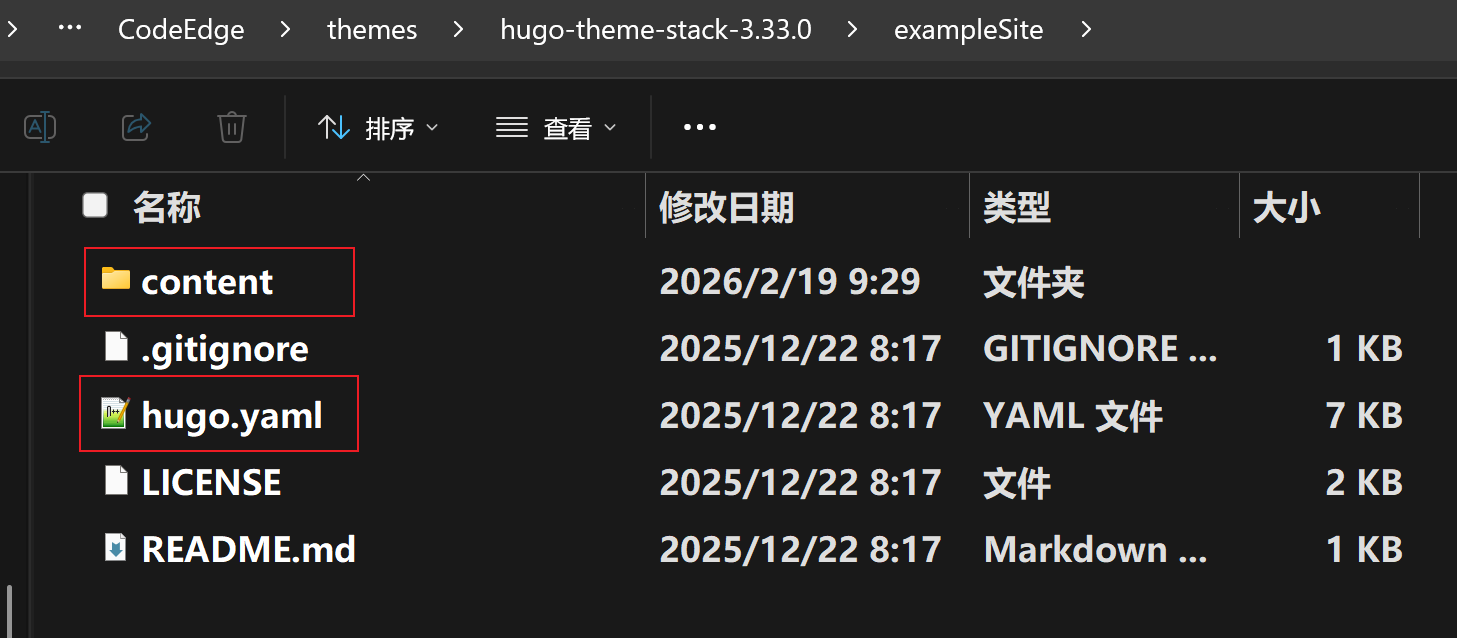
将【exampleSite】文件夹下的【content】文件夹和【hugo.yaml】文件复制到【CodeEdge】文件夹下:
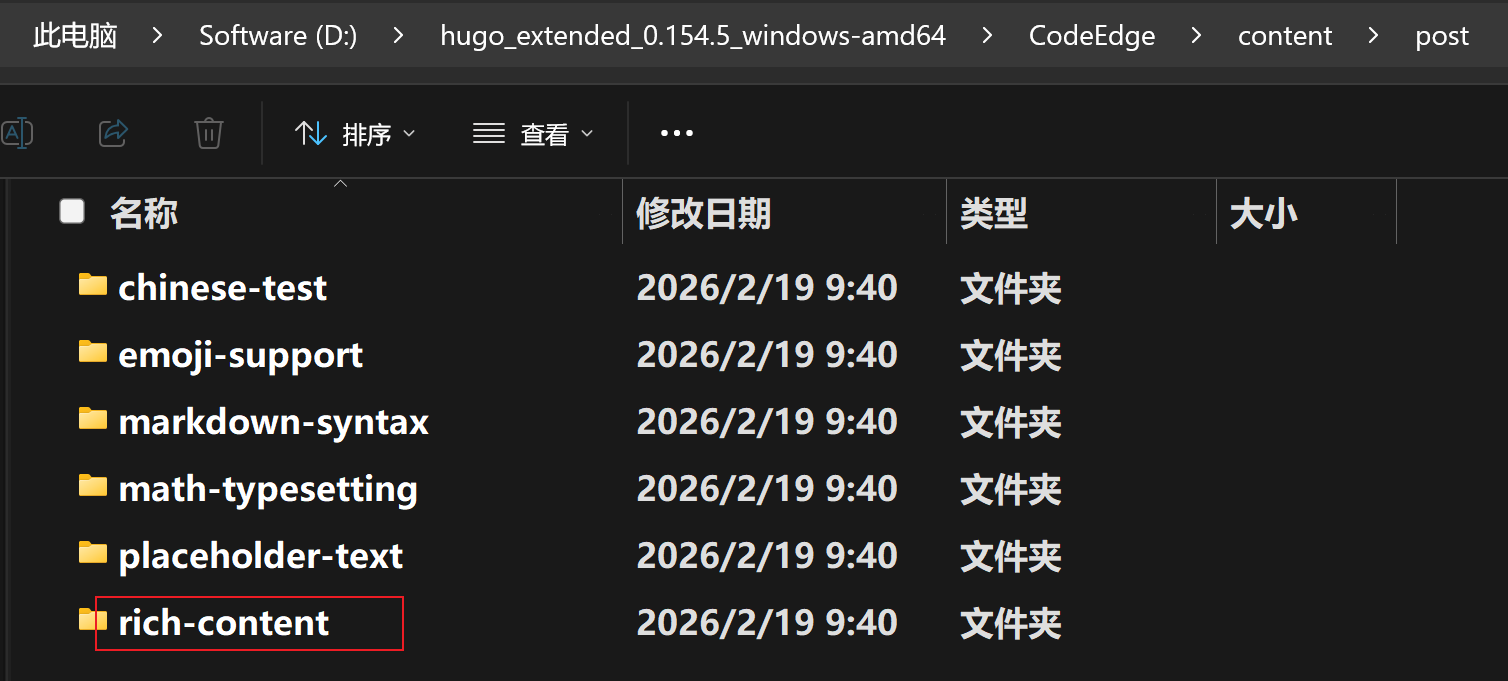
接下来,将【CodeEdge】文件夹下的【hugo.toml】文件以及【content/post】路径下的【rich-content】文件夹一并删除:
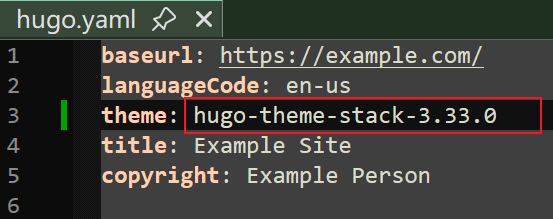
编辑【hugo.yaml】文件,将theme修改为themes文件夹下的主题文件夹同名:
在命令行中再次执行【hugo server -D】

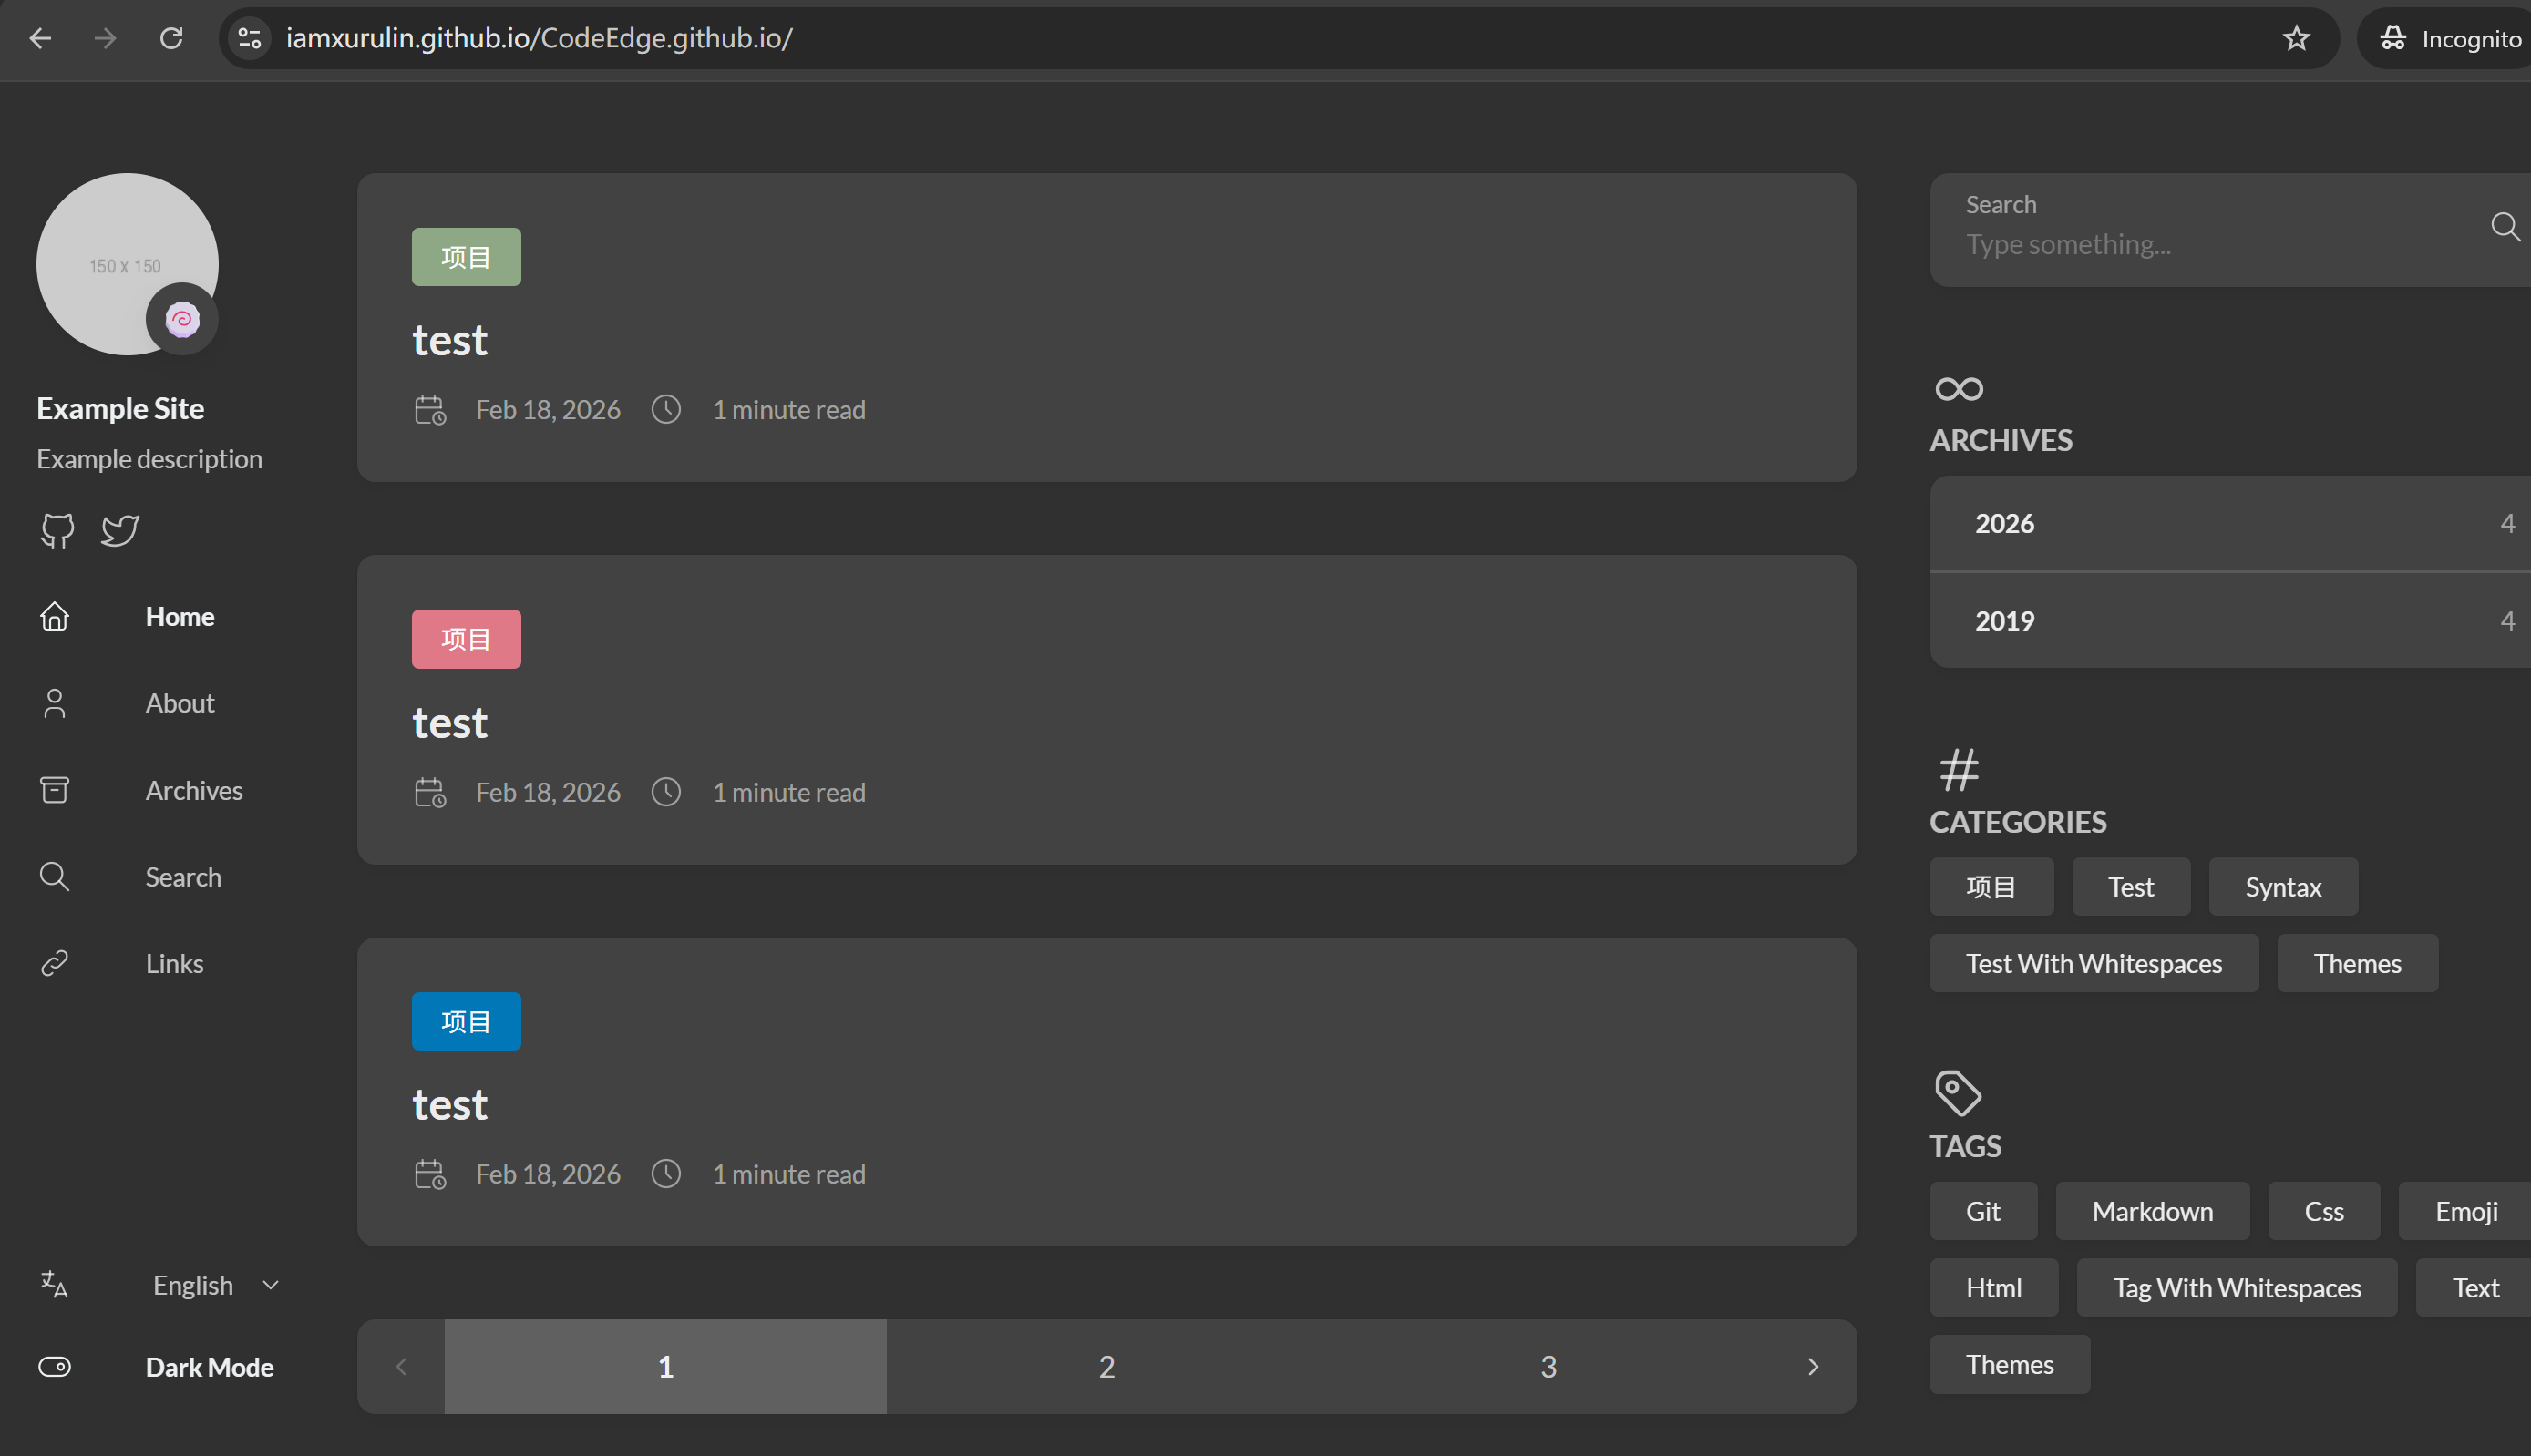
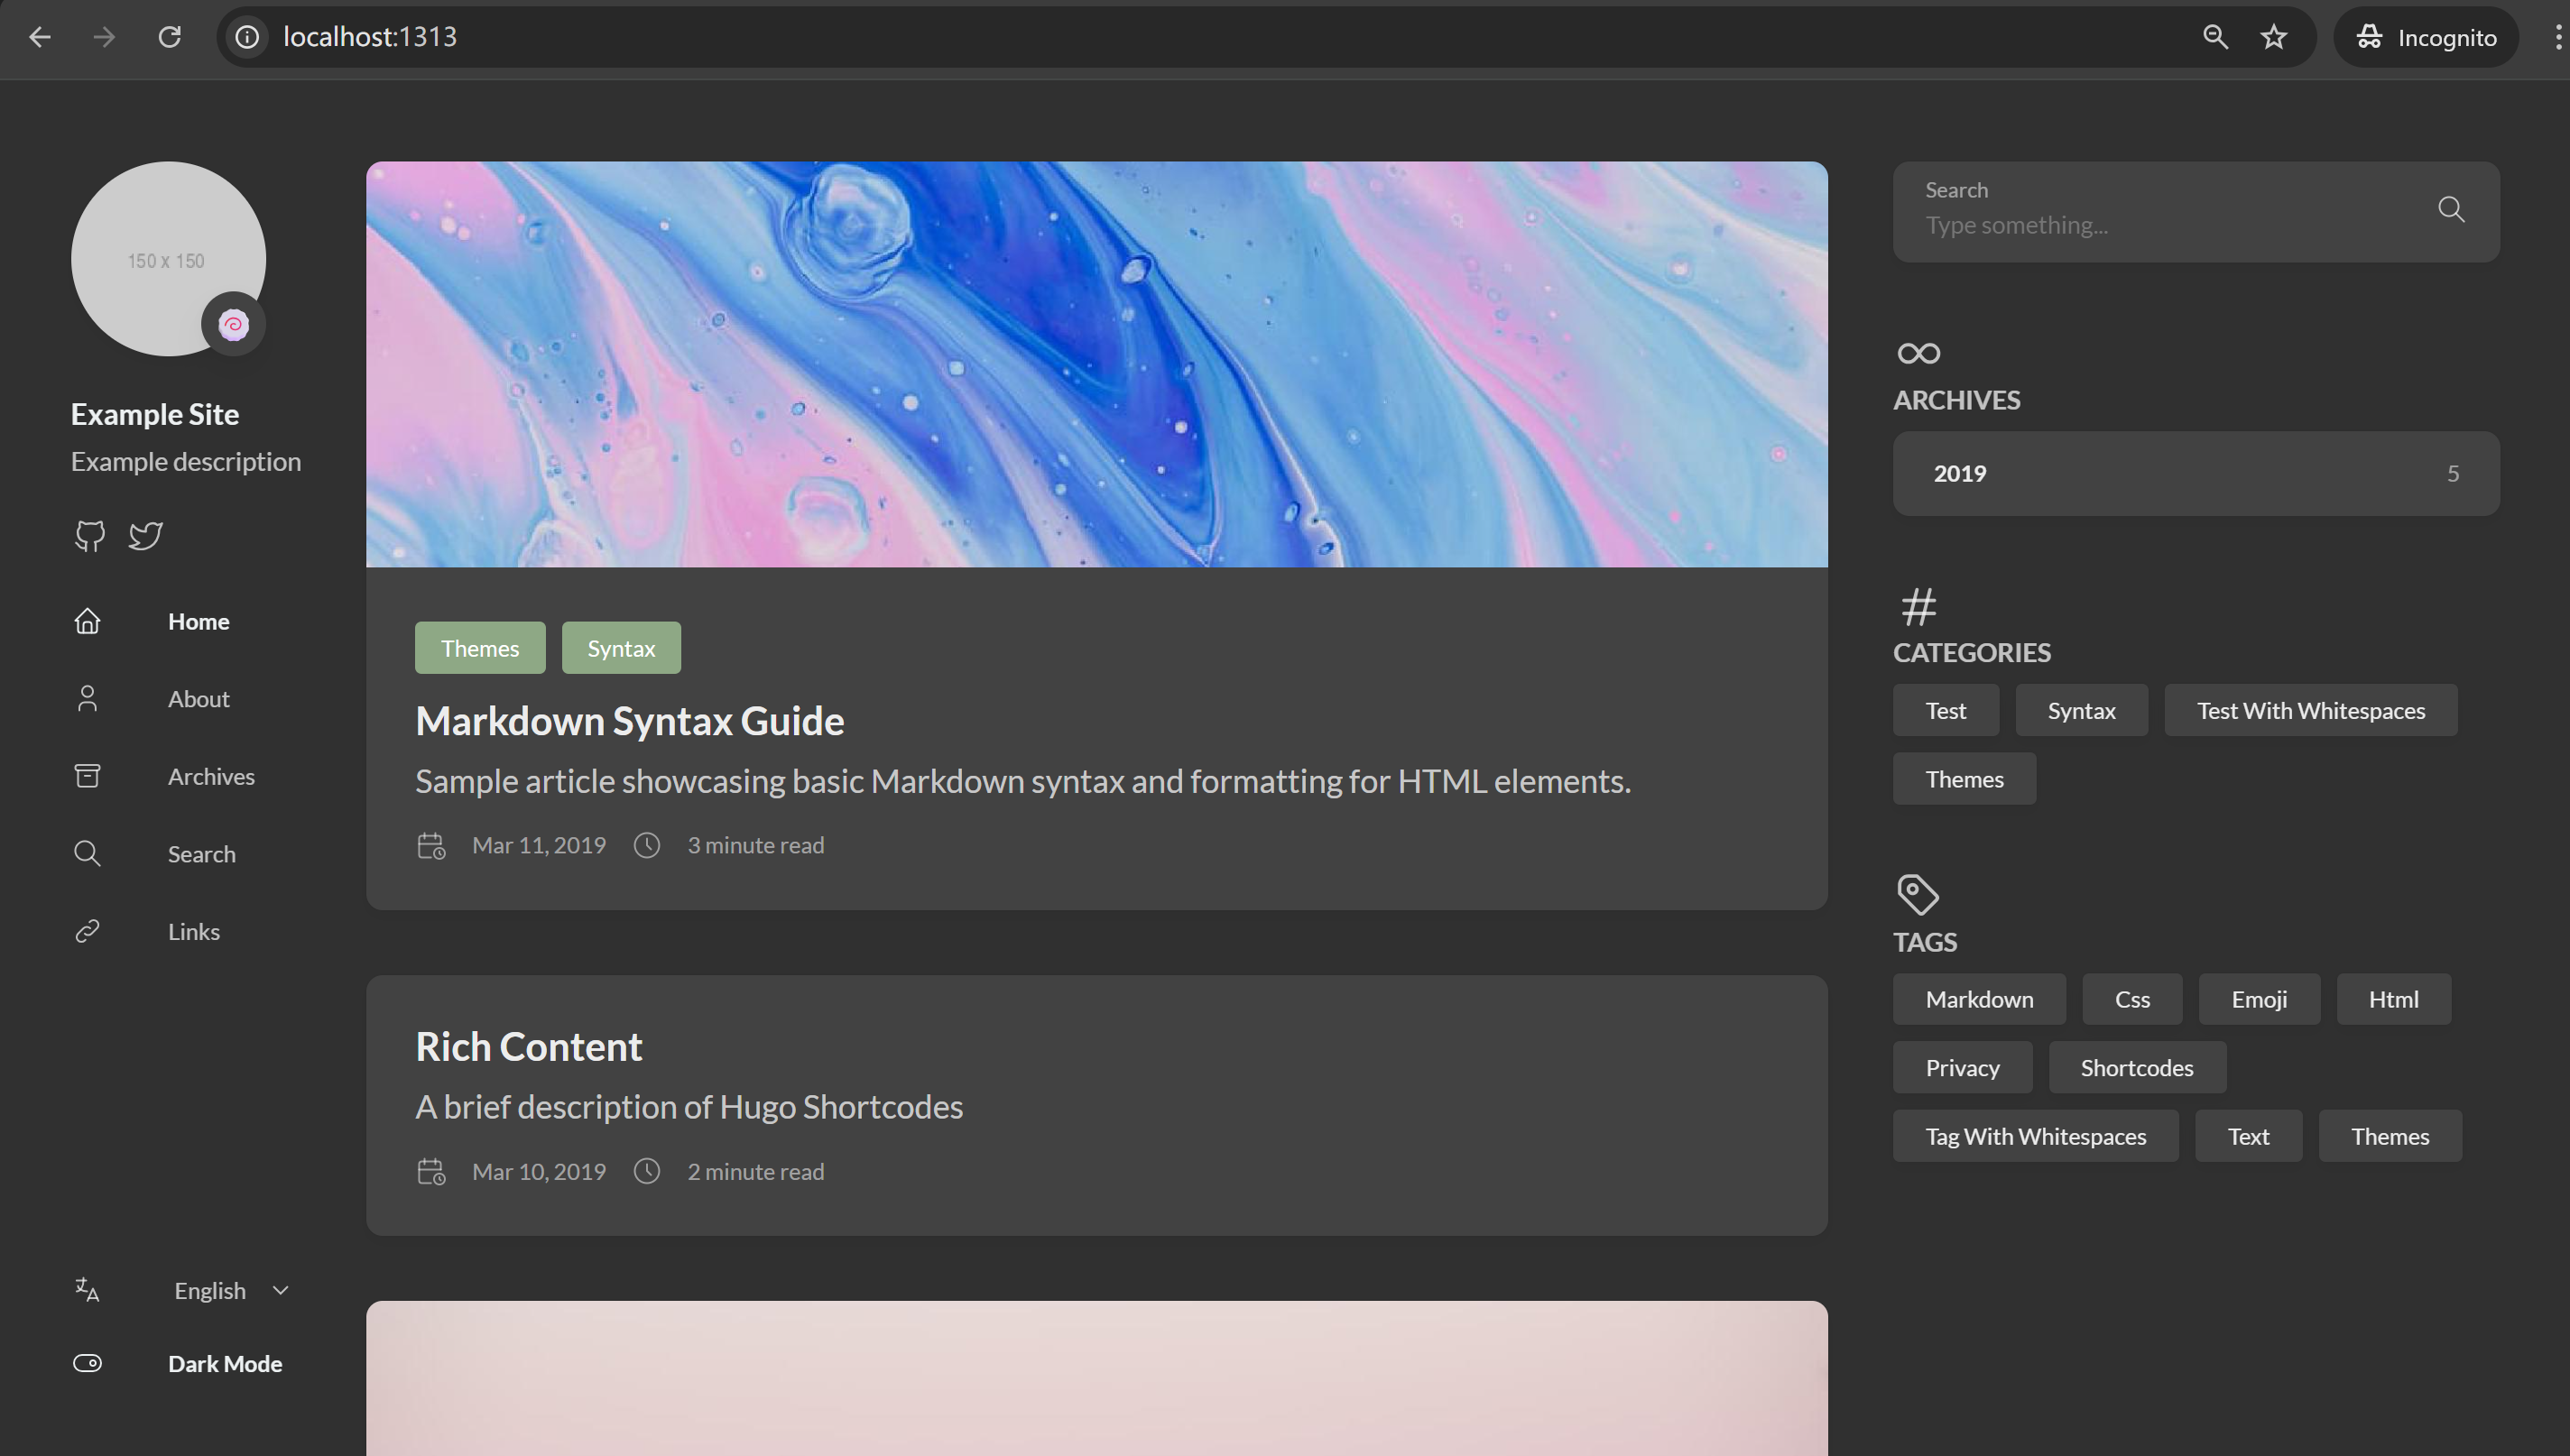
访问【http://localhost:1313】就能加载添加的主题:
新建Github博客网站仓库

在Github上新建一个博客网站仓库,如【CodeEdge.github.io】

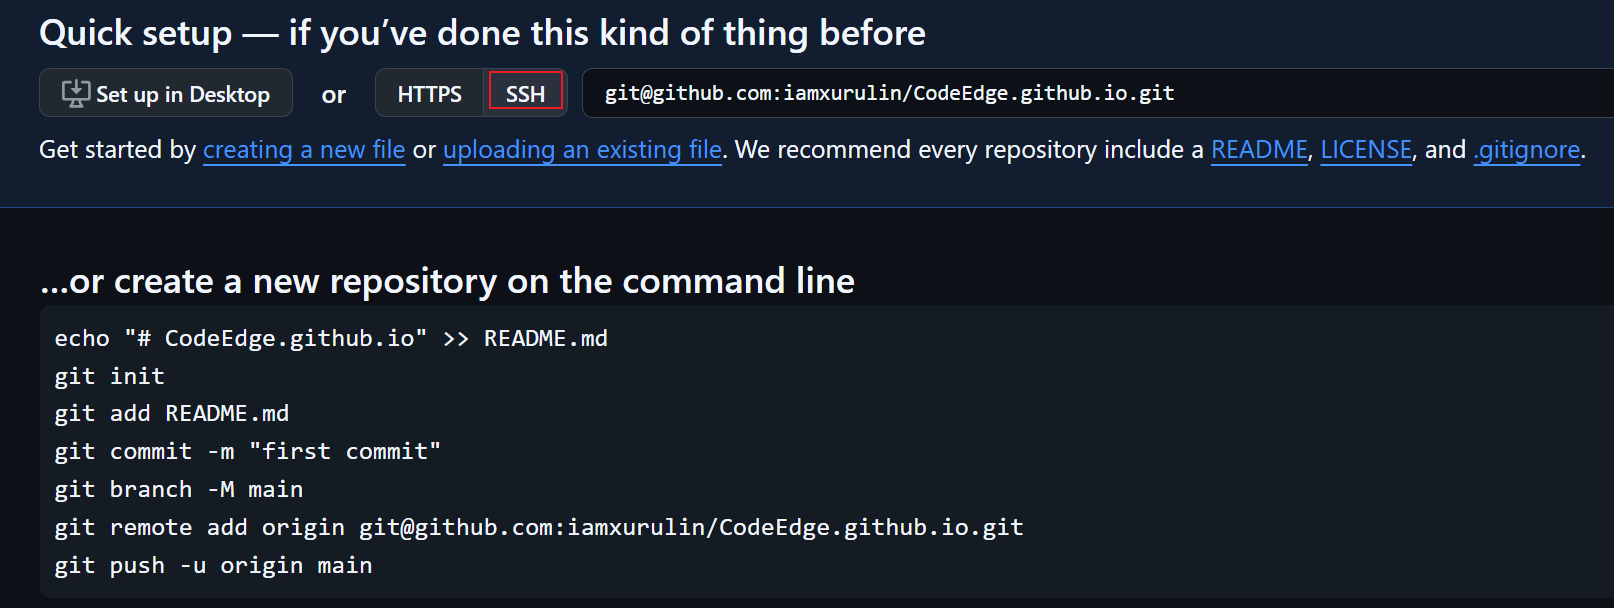
为了连接的稳定性,github上最好选择ssh:

在github的博客网站仓库依次执行以下步骤:
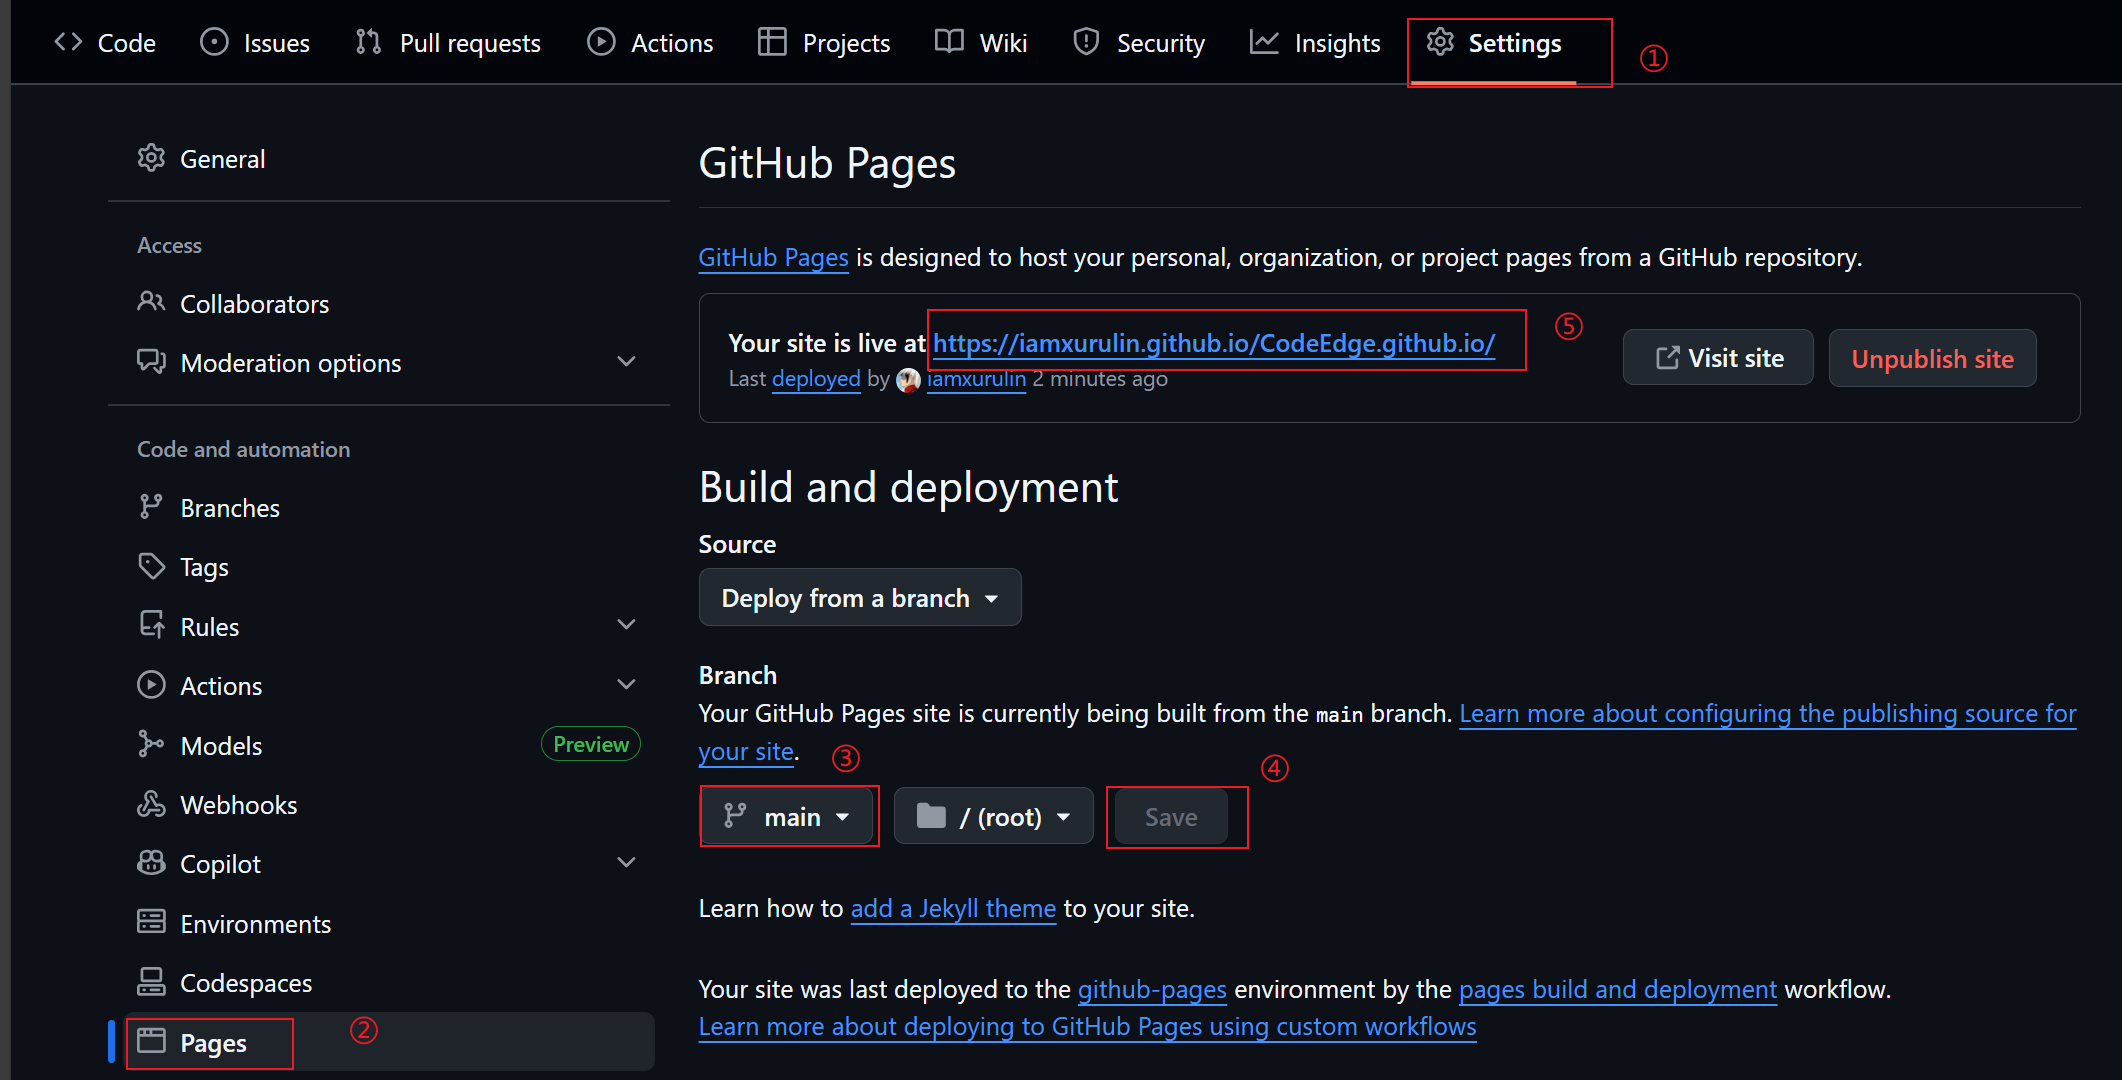
编辑【hugo.yaml】文件,将baseurl修改为如下网站名称,与上面的步骤⑤保持一致:
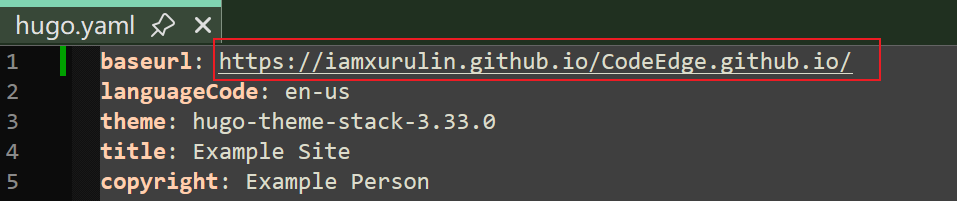
之后即可通过访问这个baseurl来查看部署的博客了。

在命令行cd到public文件夹:

依次执行以下命令:

1
2
3
4
5
6
7
echo "# CodeEdge.github.io" >> README.md
git init
git add .
git commit -m "first commit"
git branch -M main
git remote add origin git@github.com:github用户名/CodeEdge.github.io.git
git push -u origin main

新建Github博客源代码仓库

在Github上新建一个博客源代码仓库,如【CodeEdge.github.io】

在命令行cd到CodeEdge文件夹:

依次执行以下命令:

1
2
3
4
5
6
7
echo "# CodeEdgeSource" >> README.md
git init
git add README.md
git commit -m "first commit"
git branch -M main
git remote add origin git@github.com:github用户名/源代码仓库.git
git push -u origin main

实现Github Action自动部署

在github上依次进行以下操作,创建token,需要勾选【repo】和【workflow】:
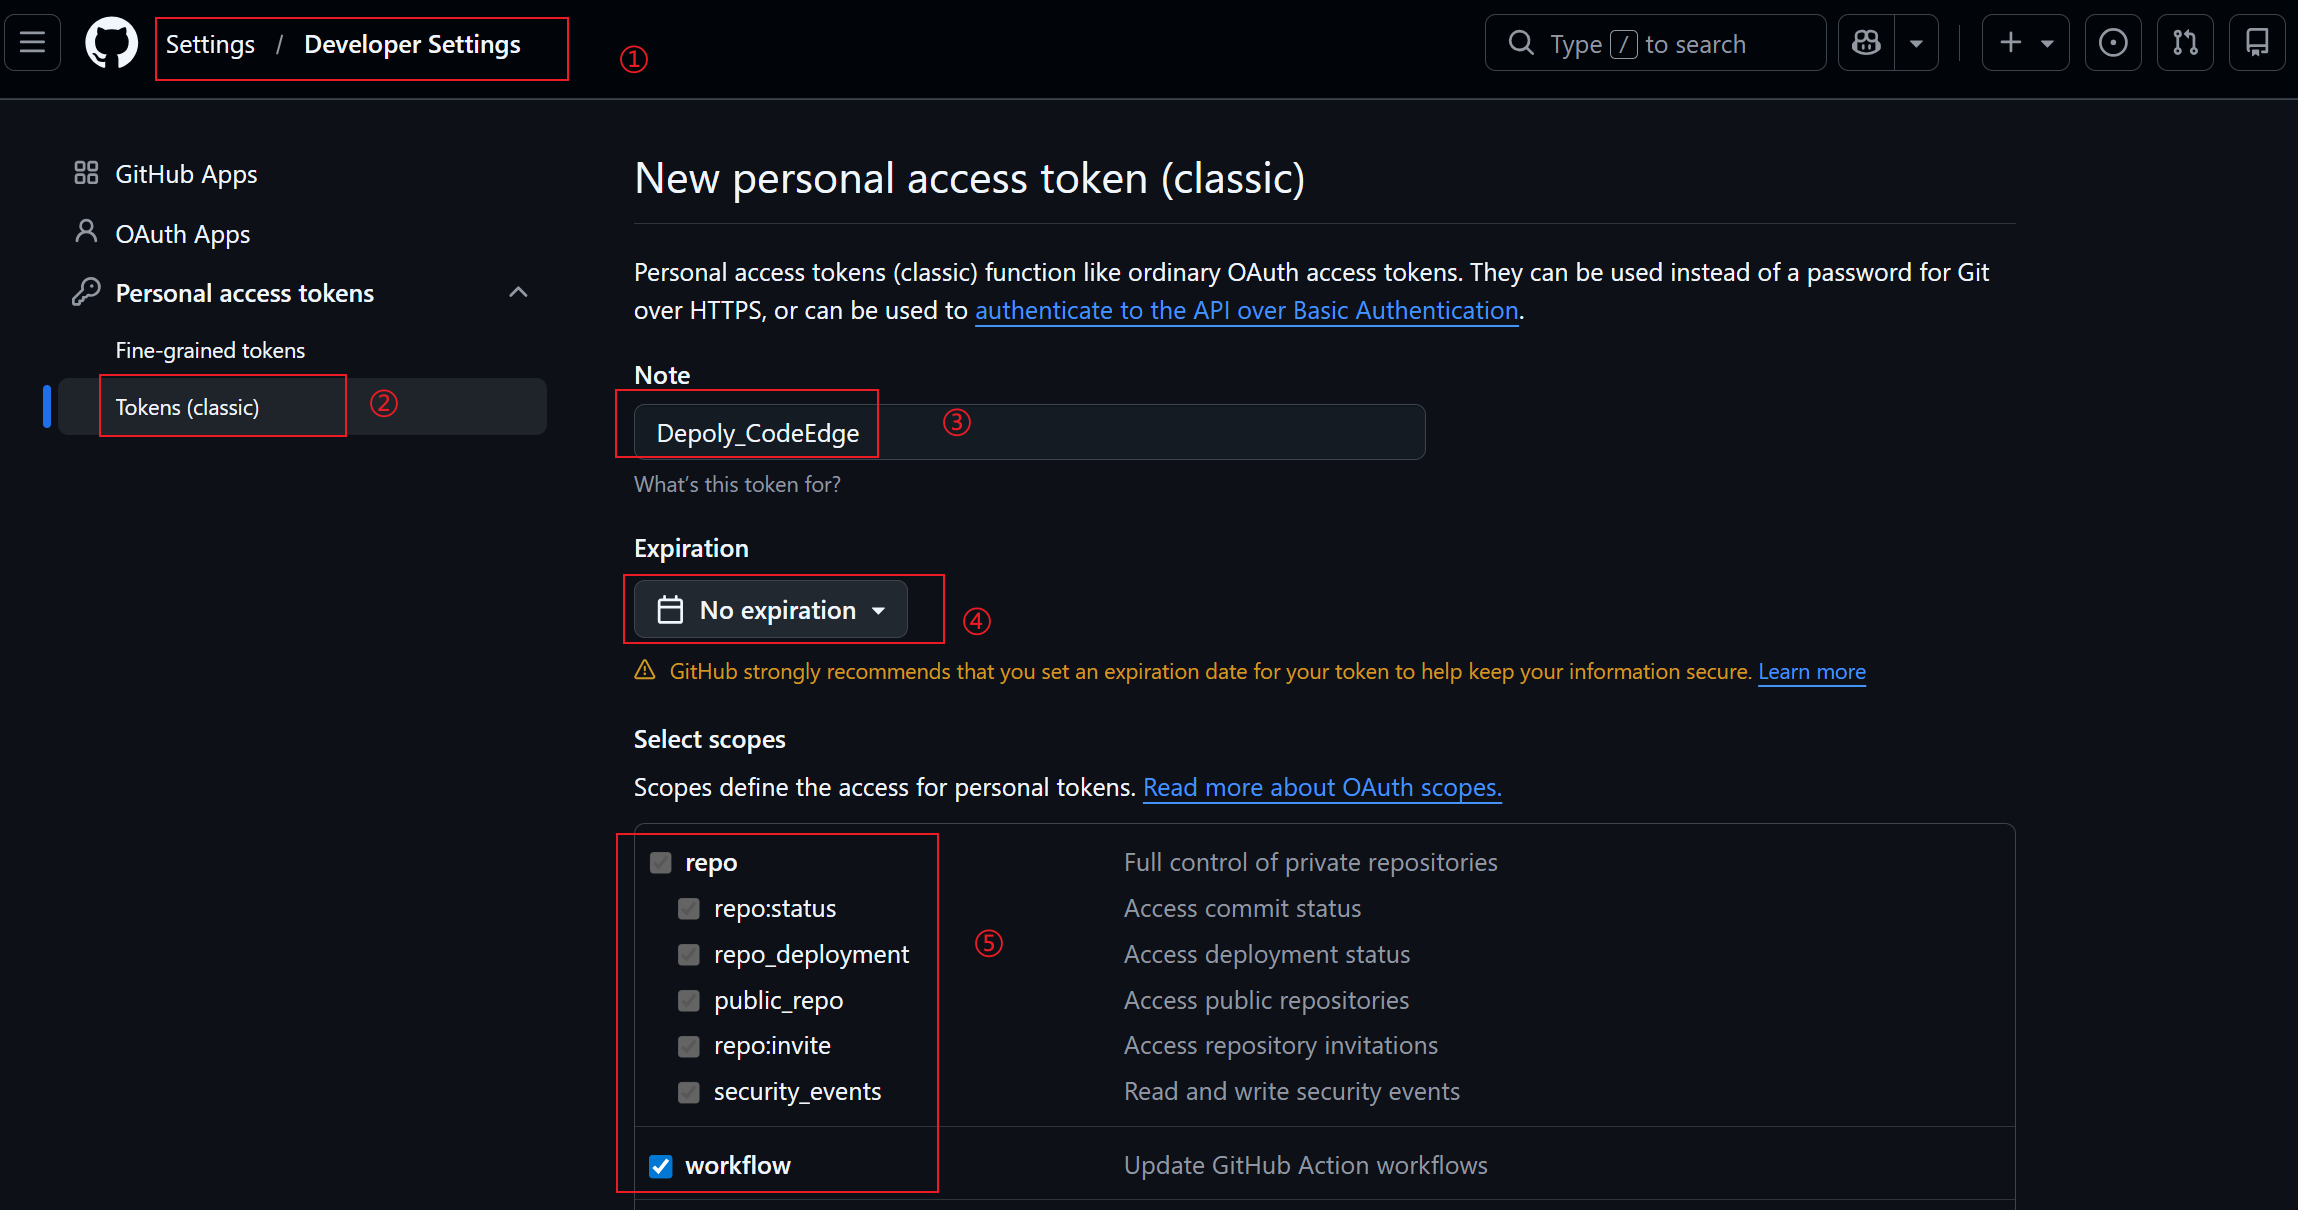
将这个token保存到源代码仓库【CodeEdgeSource】中:
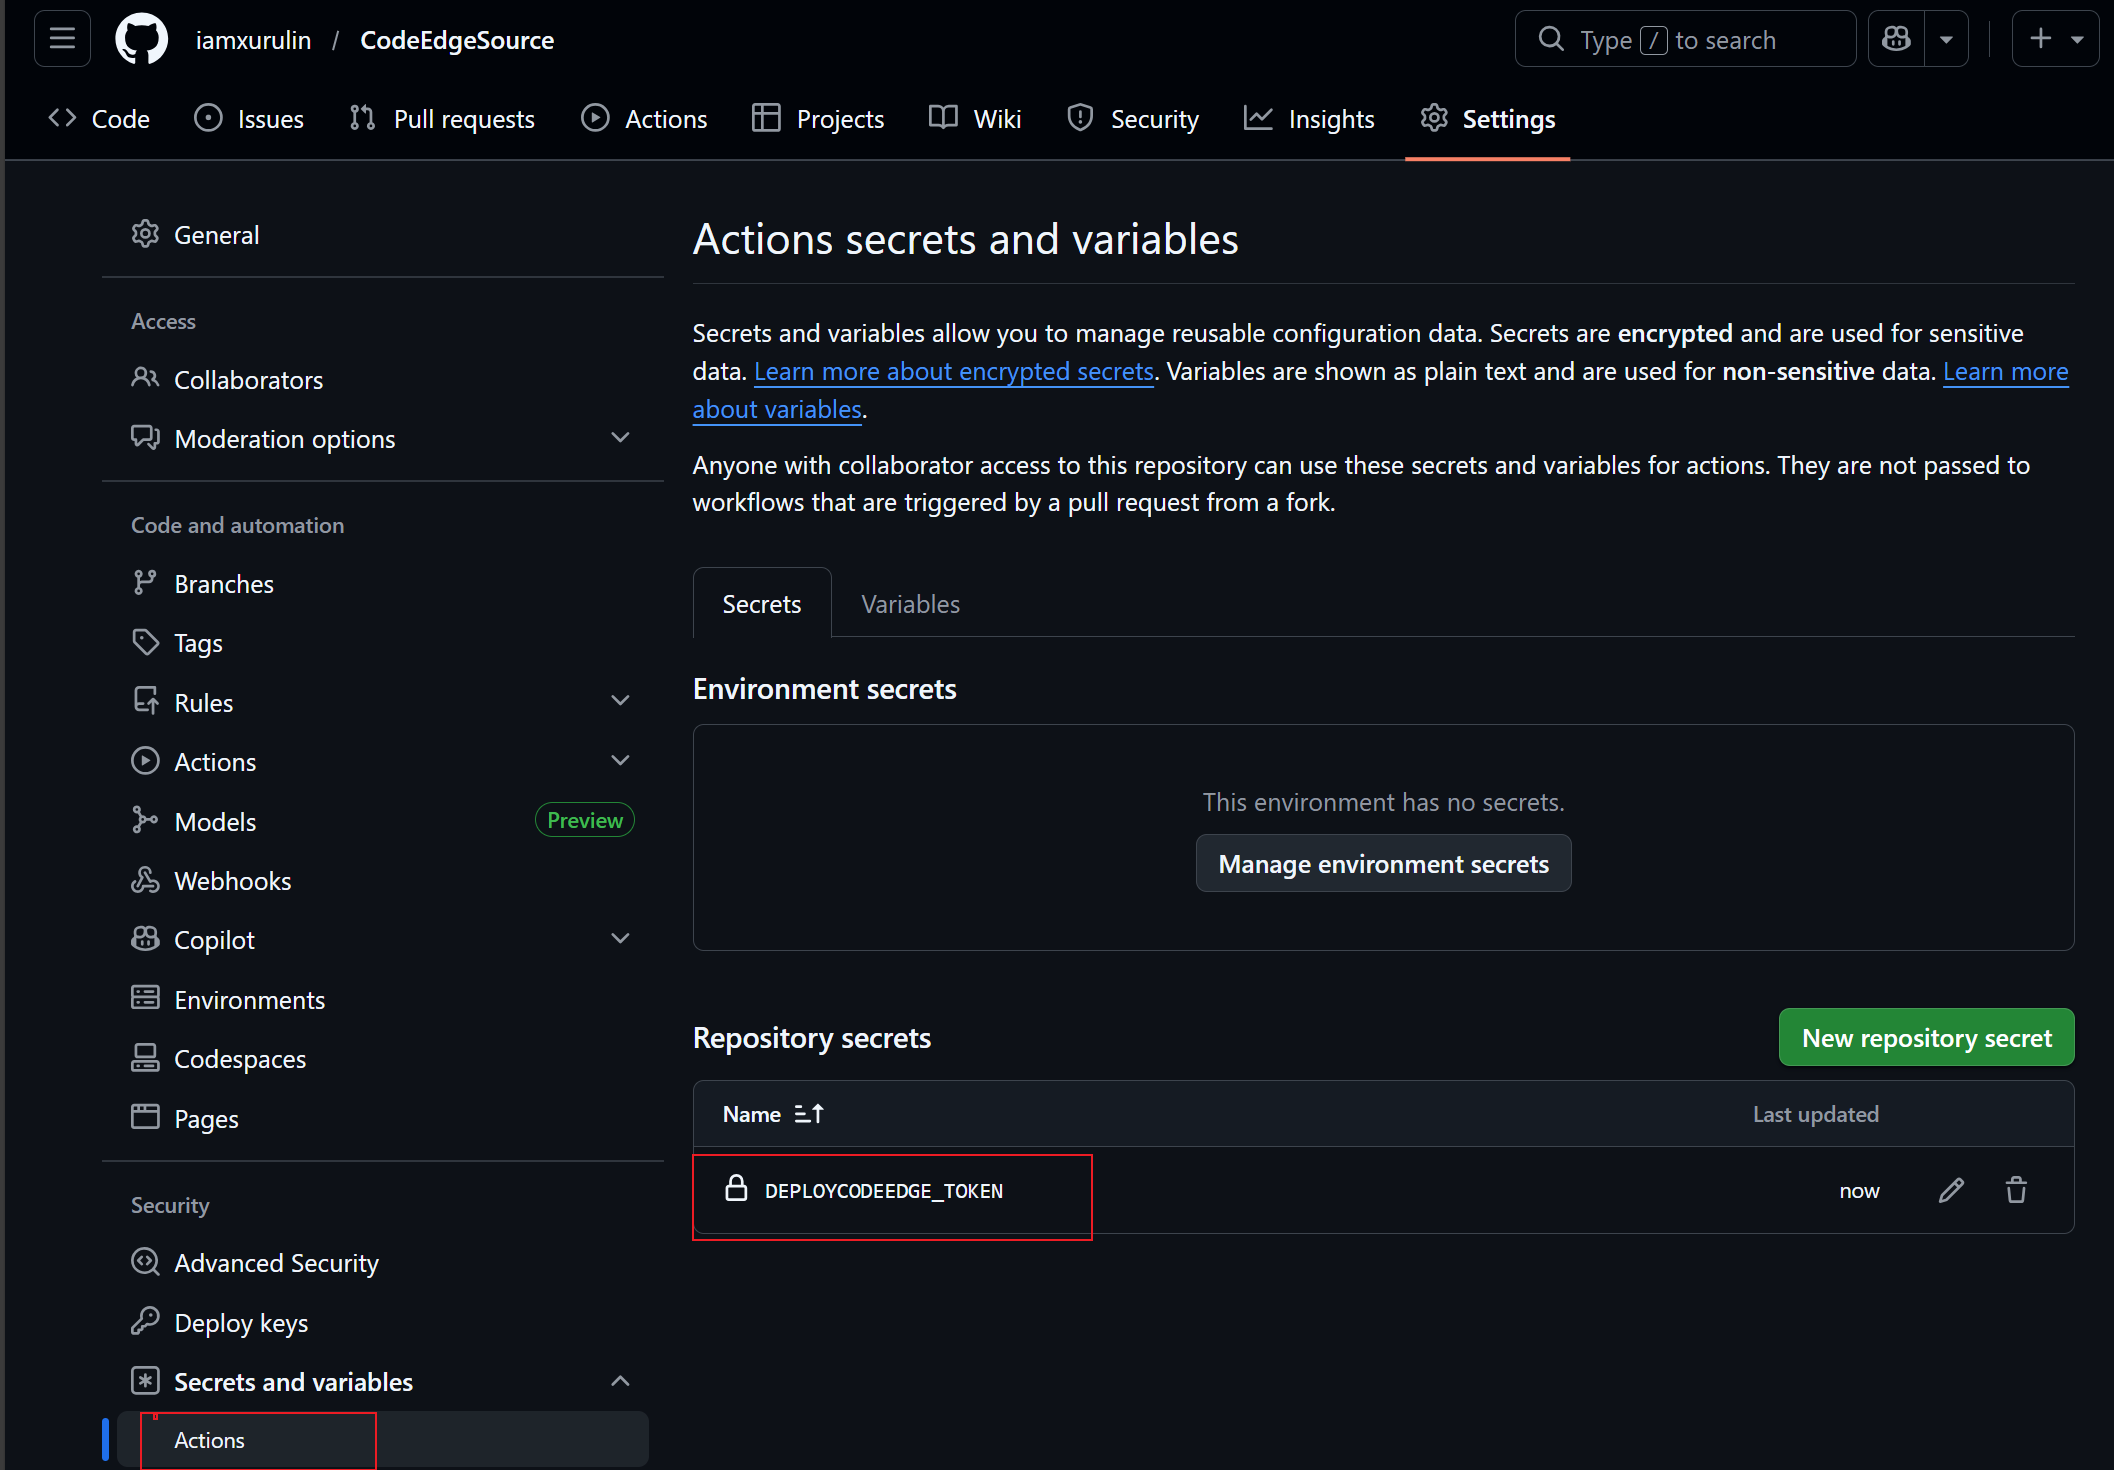
在【CodeEdge】文件夹下新建以下文件:
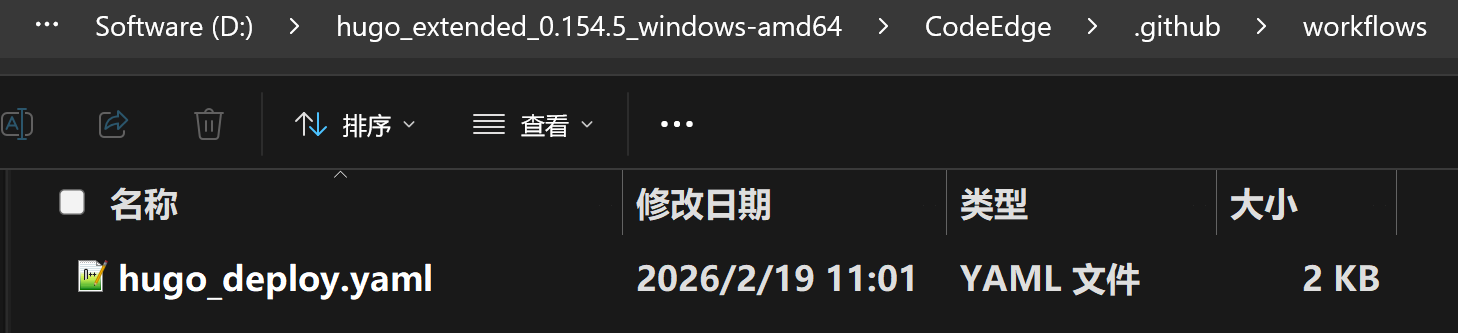
hugo_deploy文件的主要内容如下:

 1
 2
 3
 4
 5
 6
 7
 8
 9
10
11
12
13
14
15
16
17
18
19
20
21
22
23
24
25
26
27
28
29
30
31
32
33
34
35
36
37
38
39
40
41
42
43
44
45
46
47
48
49
50
51
52
53
54
55
56
57
58
name: Build and Deploy Hugo Site

on:
  push:
    branches:
      - main
    paths:
      - "content/**/*.md"
      - "static/**"
      - "layouts/**"
      - "assets/**"
  workflow_dispatch: # 支持手动触发

concurrency:
  group: deploy-pages
  cancel-in-progress: true

jobs:
  build-and-deploy:
    runs-on: ubuntu-latest
    permissions:
      contents: write
    steps:
      - name: Checkout source repository
        uses: actions/checkout@v4
        with:
          fetch-depth: 0
          token: ${{ secrets.DEPLOYCODEEDGE_TOKEN }} # 用于图片上传需要推送权限

      - name: Git Configuration
        run: |
          git config --global core.quotePath false
          git config --global core.autocrlf false
          git config --global core.safecrlf true
          git config --global core.ignorecase false

      # ============ 构建 Hugo 站点 ============
      - name: Setup Hugo
        uses: peaceiris/actions-hugo@v3
        with:
          hugo-version: "latest"
          extended: true

      - name: Build site
        run: hugo -D # 包含 draft 文章

      # ============ 部署到 GitHub Pages ============
      - name: Deploy to GitHub Pages
        uses: peaceiris/actions-gh-pages@v4
        with:
          personal_token: ${{ secrets.DEPLOYCODEEDGE_TOKEN }}
          external_repository: github用户名/博客网站仓库
          publish_branch: main
          publish_dir: ./public
          force_orphan: true
          commit_message: "auto deploy: ${{ github.event.head_commit.message }}"
          user_name: "github-actions[bot]"
          user_email: "github-actions[bot]@users.noreply.github.com"

在【CodeEdge】文件夹下新建【.gitignore】文件,避免提交以下非必要的文件:

 1
 2
 3
 4
 5
 6
 7
 8
 9
10
11
12
public
resources
.hugo_build.lock
hugo.exe

*.lock
.DS_Store
Thumbs.db
*.tmp
*.log
.idea/
.vscode/

博客部署步骤

 1
 2
 3
 4
 5
 6
 7
 8
 9
10
11
12
#新建博客
hugo new content post/XXX.md

#本地查看
hugo server -D

#部署
git add .

git commit -m "xxx"

git push origin main

当新增的博客推送到源代码仓库后,GitHub Actions 会自动执行以下步骤:

  1. 检测到推送
  2. 触发 .github/workflows/hugo_deploy.yaml 工作流
  3. 运行 hugo -D 构建网站
  4. 将生成的静态文件部署到博客网站仓库
  5. 等待一定的时间后,博客网站会自动更新

参考资料

  1. 配置ssh解决https不稳定的问题
  2. 下载 GitHub 仓库「单个文件夹」的方法
  3. 推送错了仓库的解决办法
  4. 本地改乱了代码,如何恢复成和 GitHub 仓库一致的干净版本?
  5. VS Code图形化界面操作Git
  6. 消除VS Code在检查style标签里面的 CSS 代码时产生的语法警告

小贴士

1.Hugo 需要 Front Matter 才能识别文章。也就是在文件最开头需要有以下这些代码:

1
2
3
4
5
+++
title = '配置ssh解决https不稳定的问题'
date = '2026-01-13T14:20:00+08:00'
draft = false
+++

2.github账号现在有一个输入验证码的步骤,可在浏览器上安装【2FA Authenticator】插件获取。
3.一些搭建博客可能用到的网站

免费图标网站 https://icon-icons.com/
emoji词典 https://www.emojiall.com/
在线PS工具 https://ps.pic.net/
ANI 鼠标样式转 PNG 文件 在线工具 https://ezgif.com/ani-to-apng
PNG转ICO在线工具 https://www.png2ico.com/
免费的商用字体 https://www.100font.com/
本文由 iamxurulin 原创发布,转载请保留原文链接。
最后更新于 2026-08-23 17:21:42
关于作者与文章

本文为 iamxurulin 原创技术文章。如对内容有疑问或建议,欢迎在评论区交流讨论。

Coder_Studio - 记录后端开发、算法与 AI 的成长之路